Plan Availability
What's In This Article?
This guide is designed to help you move all your existing data over to Eventeny, whether it is for a current event, or just historical data that you keep for reporting/reference purposes.
Template Download
- Click one of the below categories to download the appropriate Excel templates based on the information you are trying to import. You need to download the appropriate file(s) and enter the data on your local computer. You will not be able to edit these online templates.
-
Fill the template with your information while keeping the following considerations in mind:
-
-
Required Fields. Make sure all the fields that are marked required are filled in. If anything is missing from a required column, that line of data will not be imported.
-
Column Restrictions. Additional columns cannot be added as the system will not recognize any information outside of the template.
-
File Name. Change the file name to be the event name you would like your data imported to, as well as what type of data it is. For example, if your event is named “Galaxy Tour” and you are importing volunteer data, the file should be called “GalaxyTourVolunteers.xlsx”
-
Non-Event Data. If you are importing historical or any other data that doesn’t need to be tied to a specific event, replace the event name with the name of the primary contact, as well as the data type. For example, “JohnDoeVolunteers.xlsx”.
-
Entry Limit. Each sheet can import 100 entries at a time. If you need to import more than that, split the data into 100 record chunks, and create multiple sheets with a number at the end. For example, "JohnDoeVolunteers1.xlsx, JohnDoeVolunteers2.xlsx".
- Confirmation. Please confirm that the data you have entered is correct. Our team will check the data to make sure nothing required is missing, but we will not be able to confirm if the data entered is correct.
-
Required Fields. Make sure all the fields that are marked required are filled in. If anything is missing from a required column, that line of data will not be imported.
-
Import Your Template for Submissions
- After filling in all the information on the Excel document, make sure you are signed into Eventeny.
- At the top of the home page, hover over the "Organize" tab and select the event you wish to work with.
-
Navigate to the submissions list, ticket list, or volunteers list on your event dashboard for the template you want to import under Vendors, Volunteers, or Tickets.
-
Click "Options" in the top right-hand corner of the submission list, tickets list or volunteers list then click on the option that mentions "bulk import". For the screenshot below, the option's menu for the submission's list is displayed.
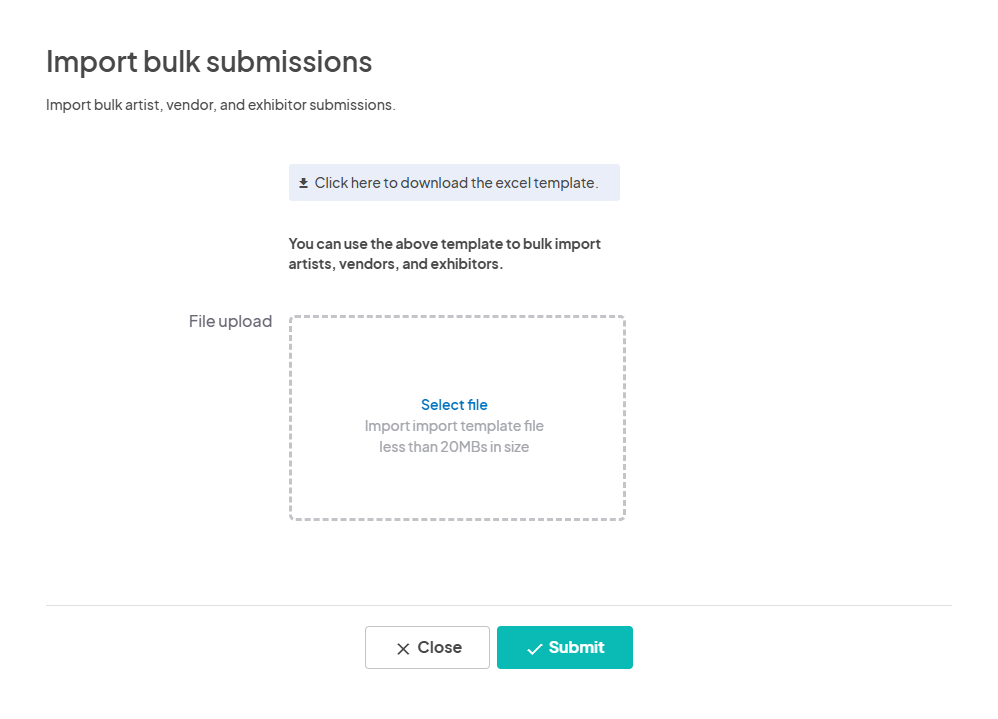
A separate window will pop up asking you to select file. Click the button and your computer's file navigation window will pop up. Select the file you wish to upload. Click Submit and your bulk import will start. Once it is complete the page will refresh, and your import will be complete!
In addition to selecting one of the categories in step one, you can also download the Excel template when you click the "Bulk Submission Import" button under "Options." Just be sure to follow the same instructions listed above to ensure a smooth import transfer.

Import Complete
- Once your import is completed, you should see all of the new submissions under the list in which you imported them. If they do not appear, go back to step 2 and double-check to make sure your application or ticket name matches what you have in Eventeny's system exactly. It must be exact, or the import will fail.


Comments
0 comments
Please sign in to leave a comment.